Let the fun begin!
Finally! My homework is finished, I’ve gotten some sleep, and Dad isn’t busy. We all know this means I get to spend more time with my rapidly growing addiction to auto-restoration.
My dad’s been nervous as a long-tailed cat in a room full of rocking chairs because our engine is going to start oxidizing if we don’t start reassembly soon. So that’s exactly what we did. When we got to TLG, I started looking up the accessories we would need to rebuild, while Dad set up “the Defender”:
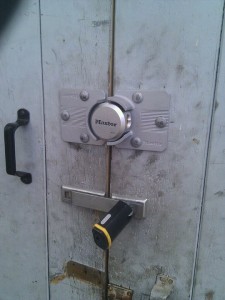
We then locked up (taking a moment to fully appreciate the new sentinel standing guard) and headed to NAPA to grab supplies. They had most of the things we needed: engine lube, Plastigage, RTV sealant, Lubriplate cam lube, and the protective hand lube Dad wanted. However, they didn’t carry piston ring compressor tools, or the correct (so we thought) engine oil. So we called Kragen, while waiting for our cheese-steaks, to ask if they sold them. It was a disaster… “Air compressor?”/”No, a piston ring compressor tool.”/”For piston rings?”/”Yes, that’s what I said.”/”Would you like to rent one?”/”No thanks, I’m asking if you sell them…” You get the idea. Dad eventually got him talking, and we learned that only South City carried the tools. After driving out and back, we finally had everything we would need to start.
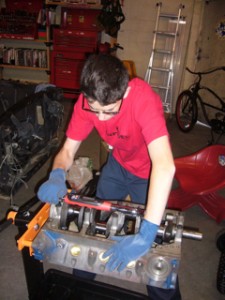
First, I cleaned off the engine stand and bolts so as not to contaminate our shiny new block, and Dad helped me lift it onto the stand. After giving the block a swipe with compressed air, I used carburetor cleaner to clean out the cylinders. Then, I removed the main caps and opened up the box of main bearings from our master kit. The bearings were placed in the crank journal and lubed up, and then I lowered our newly balanced crank onto the bearings. Charlie joined us about then, and got to work on his LED light kit for his model Batmobile.
Getting a little overzealous, I started placing the other half of the bearings into the main caps, when I realized that I forgot to lube the underside. Luckily, Dad came to the rescue and pried them out with a screwdriver. Once that situation was sorted out (and once I had received a lecture about the necessity of following the instructions when it comes to engine rebuilds), Dad gave me a dead blow hammer to help the caps seat properly. Having looked up the correct torque specifications for the cap bolts in our 1969 shop manual (60-70 ft/lbs), we fastened the bolts step by step, starting at 30, then 50, then 65, using a torque wrench. When we could see that the crank would still turn, we removed the caps again, placed the rear oil seal in the fifth cap, and placed a small strip of Plastigage across the third. (Before we left for NAPA, I checked the desirable bearing-to-crank gap, and we bought the right color Plastigage for the measurement.) We then did the procedure over again, torquing each cap in segments up to 65, making sure to start with the center cap and work our way out so as to spread the pressure evenly. When all of the bolts were tightened, I removed the center cap and Dad measured the Plastigage, which was right in the middle of the allowable range. After a quick, satisfactory check for crankshaft endplay, we sprayed down our assembly with WD-40 and headed home, on account of Dad had to catch a flight.
Until the next time, I can’t wait to continue. I love this part of the restoration, because everything’s clean and there’s no part inventory involved!

