VOILA!
Fini! Terminado! Finito! DONE!
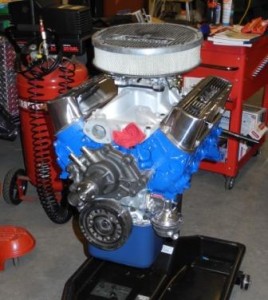
(Drums, please!) The motor is finished!
Didn’t think I’d be saying this a whole year into the project. I mean, how long can engine reassembly take? Ah well, I’ll just have to pick up the pace. My goal is to finish the whole project by the time school starts next year (sometime in August). More than half of the total hours will be put in during the summer. Hopefully I still have the drive to finish my car. No pun intended.
On this fateful day, we started at the garage at about 12:30 (sleeping in late will have to end tomorrow, unfortunately, when school starts up again). The day was started by restocking our supply of Canada Dry at TLG (an essential part of our diets). Ace Glass Services stopped by to replace the cracked windshield on my dad’s Carrera 4 while I fit the valve cover gaskets to our shiny new Edelbrock covers. Dad helped shellac the gasket to cover surface, and I put on the baffle plates for the breather and PCV system that will be installed later.
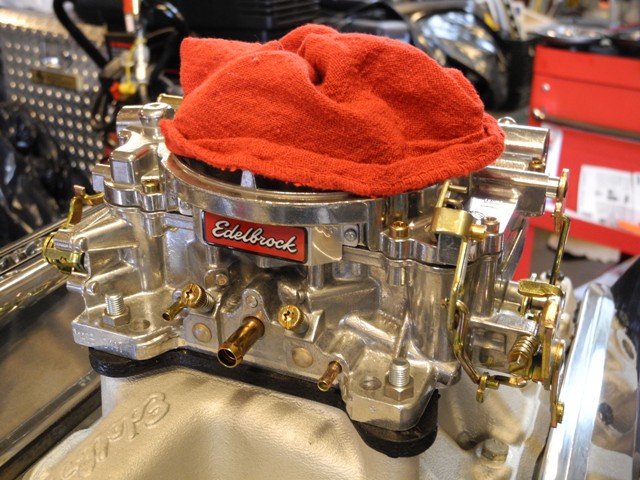
Time to screw down the valve covers. Uh oh! There wasn’t enough clearance to torque down the bolt/lockwasher combos that came with our engine bolt kit. After trying, with no luck, to remove the washers, Dad showed me how to use the bench-grinder to grind down the rounded side of the lockwashers. Many sparks later, we torqued down the valve covers and proceeded to install the carburetor. First screwing in the carb posts and sliding on the heat dissipator/spacer we bought at Vic Hubbard’s out in Hayward (great one-stop auto store), the carb went on and the nuts tightened it down. Until the engine is in the car, we can’t connect throttle or choke linkages, so we moved on to installing the water and fuel pumps.
Water pump went on without a hitch. We bolted it on over the gasket with RTV sealant on both sides and moved on to the fuel pump. After extensive hunting through the 1969 shop manual, I finally found what I had told Dad all along, that silicone sealant needed to be used on both surfaces of the gasket. We turned the crank until the pump arm fit into its slot, and greased the end with assembly lube where it meets the cam. After the fuel pump was properly torqued down, I installed the crank damper bolt and then rotated the crank with a finger in the #1 cylinder spark plug hole to find TDC (following the compression stroke) to drop in the distributor. However,we decided it made no sense to spend too much time dialing in the ignition timing with the engine just hanging on the stand, so we decided to leave the distributor off until the engine is back in the car.
A job well done.
Rob, our Mustang Man stopped by to check out progress, and Mom brought over Cousin Lisa and her boyfriend Adam to see the Garage. Glad to see everyone, please come again.


Saturday, January 8th 2011 at 4:20 pm |
congratulations on completing the engine! It looks beautiful! I can’t wait to read about the rest of the project. Hope you make some good progress over the next couple of months. Pretty exciting stuff. thanks guys!