Author Archive

Updates

Posted May 14, 2013 By jack

No more clever titles. No more fun. It’s work from here on out.

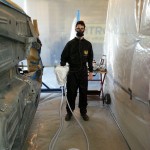
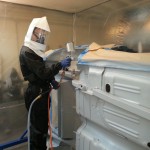
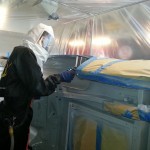
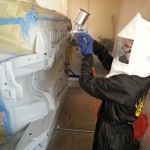
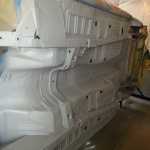
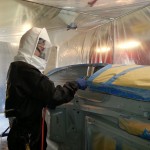
With the booth completed, the only thing left to do was to cut holes in the plastic to run air hoses inside for the HVLP spray gun and our fresh air breathing system. Once this was done, we tested out the breathing system and removed any remaining dust that had settled on the car by giving the underside a final once-over with Eastwood PRE surface prep.

After checking to ensure that our masking job was finished and procuring some paint filters, terry towels, and paint sticks from our local OSH, I set to work mixing our epoxy primer with the pigmented activator while Dad set up the spray gun. Once everything was set up and ready to go, Dad realized that he had poured the paint into the gun with the wrong size spray nozzle, so after a quick transfer of paint cups to the correct gun we were ready to prime.

While I had been masking earlier, Dad had taped a few sheets of masking paper to a wall of the paint booth for a few practice runs. Dad dialed in the spray calibrations on the gun, adjusting spray height and paint flow, and we set to work. The first batch got us about three-quarters of the way through the first coat, so we refilled, spun the car, and sprayed the areas we didn’t have access to before. Once this was finished, we refilled once more and applied the second and final coat.

Dad and I should be heading back tomorrow to apply the Monstaliner and finish our painting work once and for all.

No more fun sign-offs. Deal with it.

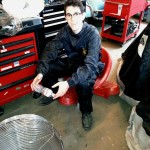
All dressed up and nowhere to go 130511 14.31.54-m 130511 14.12.14-m The Master at work 130511 13.48.41-m 130511 10.48.21-m 130511 14.12.23-m

Water break

Water break


No excuses

Posted April 2, 2013 By jack

It’s finally spring break, which means I now have more time to spend working at the garage. Which means I now have more things to blog about. Which means I should be posting more often.

Dad certainly hasn’t let me forget this. But really, there’s no excuse for the lack of communication lately, other than the fact that I’d rather spend my time wrenching, not writing. Anyhow, here’s a quick post to bring you up-to-date with my progress at TLG:

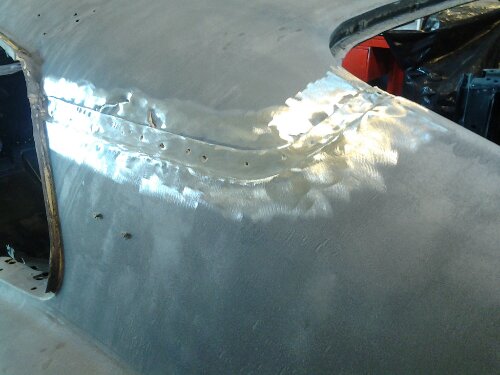
I finished up the leadwork on the rear quarter panel, adding a little more lead body filler (the one we use from Eastwood is actually Lead Free) before smoothing it over with a wooden paddle and filing it down to the contour of the body panels. We had better luck with the paddles this time, coating both the bottom and the top to avoid leaving ashes in the lead. The surface still isn’t perfect, but a thin coat of body filler will leave the area nice and smooth.

Dad finished up welding the battery tray area, which had a few holes left over from Dan’s work. I still have to grind down the welds, but this one actually has to look nice; I’ll probably move the battery to the trunk, which means the tray will be clearly visible with the hood open.

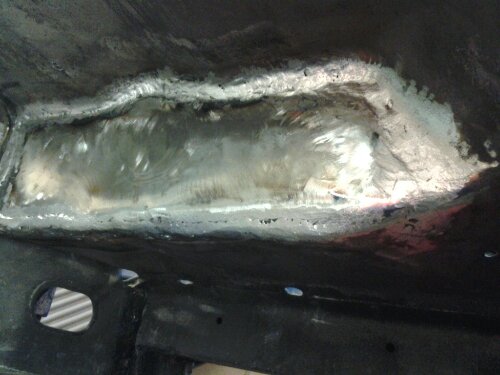
We also performed a little bodywork to reinforce some corroded areas. There was a gaping hole in the rear left frame rail (it didn’t look like rust, but I can’t conceive of any other cause), so we used the Bad Dog Biter (a sturdy nibbler) to fit a piece of sheet metal to the frame. We did the same in the front of the left inner fender, which was slightly more tricky, owing to the fact that it needed to cover three surfaces converging at a corner. We tried spot-welding the new metal to the old, but it wasn’t perfectly fitted and the gaps in some places were too large for a good bond. We then tacked both into place, and filled in the rest with a bead. Both are ground down completely and looking ready for action.

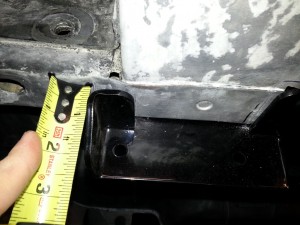
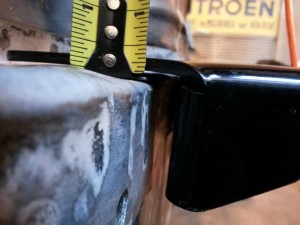
Yesterday, I spent a good chunk of time fitting the sub-frame connectors we bought from Total Control Products. The emergency brake cable bracket was preventing one of the connectors from seating properly, so I ground down the part of it that was welded to the frame rail until we could pry it free of the spot weld. I then stripped away the powder coating on the surface of the connector that cups the front frame rail, and still it didn’t fit very well. It appears the connector was welded at an angle, and so we’ll have to fill the gap with some extra metal. The fit in the rear was also pretty shabby, so I’ll contact TCP in the morning to see what they recommend.

We’re scheduled to have the car at the paint shop by the end of this week or the beginning of the next, so we still have quite a bit of work left to do. Dad ordered some plastic sheeting to erect a paint booth around the car, as well as a good supply of Monstaliner bedliner for coating the undercarriage. Once the sub-frame connectors are welded in place, we’ll be ready to prep the metal for a coat or two of primer and then spray the bedliner. We also did some research on the correct paint specifications for the Boss 302, which we’ll provide to our painter.
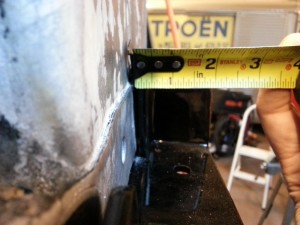
measuring subframe connector fit
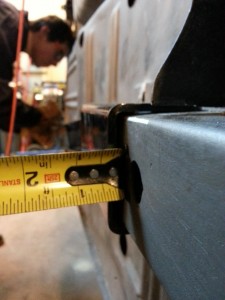
measuring subframe connector fit

connectors must fit with minimal clearance
2013-04-01 18.46.48

it’s important to measure gaps at all welding joints

Leadslinger

Posted March 13, 2013 By jack

T-minus two and half months until deadline. We’re moving right along here at TLG, thinking about various projects simultaneously as the time ticks right on by. Lately, we’ve been communicating with the folks over at the United Auto Collision Center (a friend referred us for a paint job), who have been quite unhelpful and unaccommodating: it took at least four calls to get a hold of the man we were looking for (and we never received a call back), and after finally contacting and establishing a time to meet with him he stood us up. Needless to say, we know where we won’t be going for a paint job.

image

Surface preparation

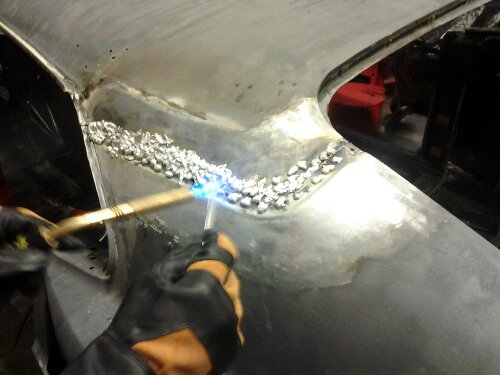
In the meantime, I’ve been finishing up all the tasks left over for us to complete before we can paint the car. This weekend, my dad and I finally got around to leading in the left rear quarter panel seam. After we had moved Charlie’s Lexus outside for some elbow room, I began by cleaning up the metal using a pneumatic angle grinder with a 36-grit sandpaper wheel. With the surface prepared, we applied the tinning compound and worked it in with a coarse steel wool, melting it over the metal with a propane torch. Once it had cooled, I wiped down the area with lacquer thinner to remove any impurities, and then with a water/baking soda solution to neutralize the remaining acid. To be clear, we didn’t use real lead, but a substitute made for this purpose (and legal in California). Application wasn’t terribly difficult, requiring only that the metal be hot enough for the lead to bond properly but not so hot that it would run off. Spreading the lead, on the other hand, was slightly more trying: Dad kept setting our wooden paddle on fire, and because our surface was inclined we learned to apply the lead above the area to be filled.

image

Applying the lead

With the seam now filled in, I can get started on filing it down. I have a feeling I’ll need to apply a little more lead to get a perfectly smooth surface, so I’m going back in tonight. Once this is finished with, the next priorities are the interior and underside. After those have been finished, we can get the car rolling and deck it out with paint.

Work on the side

Posted March 4, 2013 By jack

Since Dad needed a little help prepping his ’27 Rally ABC for the California Mille, which we’ll be running this April, I spent a bit of time away from the Mustang to lend a hand.

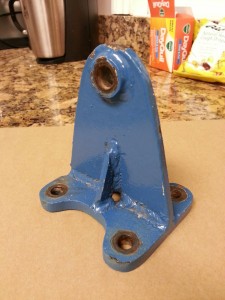
When Dad purchased the car, our friend and vintage race enthusiast Ed recommended we replace a rear suspension bracket that had been poorly welded together. Over the weekend, we (read I) removed the part from the car while Dad schmoozed with his buds who stopped by the Candy Store. Access was a little tricky: the bracket was held in place by U-bolts which rested over the Bugatti rear axle, but a number of other parts got in the way, and the nuts needed to be loosened with a breaker bar. Thankfully, both the right and left side brackets are symmetrical, so I only needed to remove one to take its dimensions.

…and the finished product.

Why yes, that IS me leaving greasy handprints all over a pre-war French racecar!

The original part…

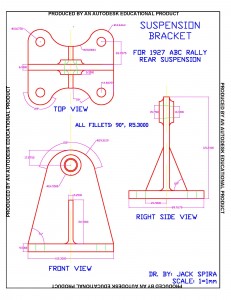
Once removed, I recorded its measurements with a micrometer and set to work replicating the part in AutoCAD (thank god for free student software). It had been a while since I drafted anything on the computer, but I dug up a handout on layer properties from my Engineering Technology class last year and was running again in no time. Dad will send the finished plans to a machine shop to have the part milled from steel. It should technically be made of cast metal, but a milled part with filleted edges will be structurally durable and look authentic enough.

Back to the Mustang now. I’ll be meeting with someone at a highly-recommended body shop to get a quote on a paint job today. Three months left till the deadline—time for the cram!

Moving forward

Posted February 24, 2013 By jack

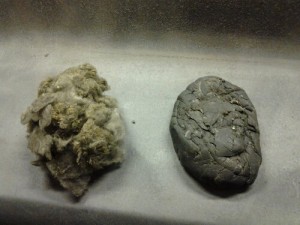
As expected, cleaning the car hasn’t been the most enjoyable part of the restoration, but after all, somebody has to do it. Glass abrasive appears to have caked itself over everything, even some areas that haven’t seen sunlight since the car was assembled back in ’69. Needless to say, it’s been tough work. In addition to the confounded glass, I had also neglected to scrape off the gummy adhesive that lines the windowsills and doorjambs when I removed the windshield and doors, so it was about time I tackled that task. Using a gasket scraper, I first removed all excess gunk on the car, before applying denatured alcohol to eliminate the residue it left behind. Since we’ll be painting the interior soon, I focused on the inside of the car, pulling all the remaining fiberglass insulation out of the roof as well as all the glass abrasive I could access.

The fruit of my labor: two sizable globs of fiberglass and window goop.

I’ve decided to leave the rear quarter panels alone. Should I, or any future owner down the line, decide to return the car to its original S-code specifications, re-replacing the panels to include the fake side scoops would be a significantly irksome task, considering it could have been avoided to begin with. Finally, there’s also the financial matter: the car will never be more valuable as a Boss 302 clone than as an original ’69 S-code.

The next few steps are to weld in the roll cage and sub-frame connectors, lead-in the left rear quarter panel seam, and have the underside, interior, and engine compartment painted. Looks like quite a bit of fun ahead of us yet!

Spring Cleaning

Posted February 6, 2013 By jack

Well, Dad’s off to Europe. He and a few of his buddies decided the American auto scene didn’t offer enough panache, so they’ve been living it up at the Retromobile in Paris, France. Meanwhile, I’m stuck at home with a car to restore.

image

In the past few days at the garage, I’ve finished grinding down the welds in the battery tray area, which is now looking good as new. When I wire up the car later, I may decide to move the battery to the trunk for a more balanced weight distribution, in which case there would be no need to actually weld a tray to the metal. Originally, the battery rested on a small platform to keep sulfuric acid off of the metal surfaces (and that worked just swell), but that was rusted through and cut out with the rest of the metal.


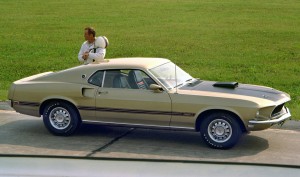
Next step is to go over every inch of the car and remove leftover glass abrasive and dust with an acid etching compound. As I clean up the car for final bodywork and paint prep, I’ll have to make some decision regarding the fake side-scoops in the rear quarter panels. My original plan had been to cut them out and weld in new metal, in keeping with the design of the 1969 Boss 302 I’m replicated, but today Dan the Muffler Man pointed out that the scoops are actually quite desirable, and removing them would diminish the value of the car. Thoughts, anyone?

(click for greater detail)

1969 Mach 1 w/ side-scoops

1969 Boss 302, sans side-scoops

Dan to the rescue

Posted January 28, 2013 By jack

Well, it looks like Dad’s welding mishaps were too difficult to fix after all. Since we didn’t want to inflict any more damage than had been done already, or delay our project any longer, we decided to leave it to the professional. Dan, who runs the muffler shop across the street from TLG, was kind enough to finish the job for us. He quickly patched up the blowout holes, and now all I have to do is grind down the excess metal. Next step: rear quarter panel replacement. These will probably be spot welded in place once the old ones are cut out. Dan told my dad that the 1969 Boss 302 had fake side scoops like ours, but I’ll have to run a fact check on that—I’m pretty sure I remember the Boss looking a bit more sleek.

Dan cleans up nicely

Back in business

Posted January 8, 2013 By jack

First post of the new year! This year I resolve to finish restoring the Mustang by my high school graduation on May 31, and if I put the pedal to the metal I might just do it.

We visited the garage last night for the first time in a while (my winter break was spent skiing). Dad and I worked to finish the job we had started by filling in the remainder of the holes around the battery tray we fabricated with weld tacks and grinding down the excess metal to reveal any missed spots. The grinding took some time (even with a 36-grit sanding disc on the pneumatic die grinder), but I took it down to a manageable level. Grinding away at the metal also cleaned up the surface for further welding, but that didn’t stop my dad from making of mess of my hard work…

Now that we’d moved to a smaller guage wire (from .030 to .024), Dad discovered that it was possible to lay a continuous bead along the sheet metal. Dad’s zealous trigger finger, combined with the fact that grinding made the metal thinner and that one of us had accidentally bumped the wire-feed dial from 30 to 40, led to numerous blowouts. By the time I had stopped him from wreaking havoc on my car, Dad had managed to place a few sizable holes in the place of what had just been smooth, clean welds. It was time to leave before we got a chance to perform any repair work, so at least I have a plan for my next jaunt at TLG.

Expect a much more frequent posting schedule in the upcoming months. I plan to visit during the week whenever possible, and every weekend.

Next Steps

Posted October 2, 2012 By jack

I would have liked to finish my restoration project by January 7, 2013 (the last day of winter vacation), but that’s simply not going to happen. Between cross country practices and meets, school work, college applications and essays, it’s a minor miracle that I still find time for optional items like a decent nights sleep or a social life. My courseload and team committments kept me out of the garage much of last year and this year I want to do a better job of scheduling my time to fit in more wrench time.

As a start, I compiled a list of what’s left in the restoration:

  1. Finish cleaning the car. This will be done step by step, starting with the underside and working our way around.
  2. Prep the bare metal using an acid etch to prevent rust and for better paint adhesion.
  3. Lead in the left quarter panel and other exposed seams.
  4. Prime the sheet metal, using weldable primer on the areas where we plan to replace sheet metal.
  5. Repair rust spots in the battery tray and frame rail (something we started before re-prioritizing).
  6. Replace the sheet metal in the quarter panels. The replacement skins arrived in a ginormous box, so we can now get those hideous side scoops off.
  7. Repair bad repairs in roof and engine compartment.
  8. Paint underside of the car before continuing to step 9…
  9. Weld in chassis reinforcements and roll cage.
  10. Determine if doors need work and strip door trim.
  11. Install suspension and wheels to get the car rolling again.
  12. Tow it to Precision Auto Body, have it painted, and begin reassembly.

While it’s not very detailed, I’ll use this list as a high level sequence to guide me through the next few steps while I flesh this out into a more detailed plan for the rest of the project.

Onward!