High Voltage hi-jinks

learning to weld
And just like that, we’re on the other side of the restoration. No more disassembly, no more removal, no more stripping; now, we’re putting Humpty Dumpty back together again.
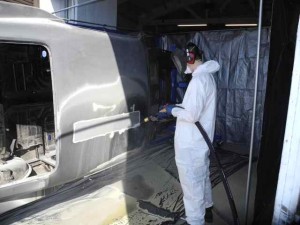
On Friday, Dad and I erected a small structure of aluminum poles in the garage, 20ft x 10ft x 8ft in all. While I was working out on Saturday morning, Dad picked up a heavy-duty air compressor and all the necessary safety equipment we would need for the day ahead. We met up at the garage, draped our containment structure with tarps, and hooked up the blaster to the compressor. We donned our Tyvek coveralls, breathing masks, face shields, and earmuffs. Then we began to blast.
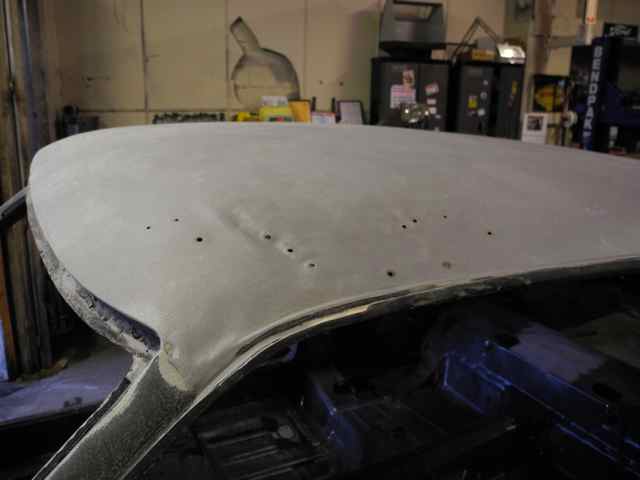
The ground glass that the DB150 uses cuts through primer and rust surprisingly fast, which made the stripping process fairly quick: in all, we did the entire car in only 3 hours over two days. The part that slowed us down, however, was the immense amount of body filler on the roof, which took a lot longer to blast through. In places, there was Bondo laid 1/2 inch thick. Beneath these spots we found holes poked through rippled sheet metal, evidence of a cheap repair job (we’ll clean these up later with a hammer and dolly, and hopefully do a much better job at applying the filler). Another factor that slowed us down was the face shields—every time one of us accidentally blasted into a pocket or depression, the media would shoot right back at us and cover our shields, which needed periodic cleaning.
Aside from the roof, we also cleaned up the entire underside, both rear quarter panels, the cowl, and parts of the engine compartment and inner wheel wells. Preparation and clean up took far more time and effort than the actual blasting. After the first day, we found that the entire garage had been dusted with a light layer of glass, so on the second day we added an overhead cover to our blast booth. Even then, all of the glass left a complete mess. The drop-clothes that we laid down caught a lot of it, but were so heavy when we rolled them up that they needed to be put on a dolly to be transferred to the dumpster. After much hosing and sweeping, we finally cleaned the garage, sidewalk, rotisserie, and booth materials (the face shields we consigned to the trash).
Getting glass off of the car was much harder, so we’re letting it dry before we try to vacuum it out. Then we’ll apply a rust inhibitor to all of the exposed sheet metal and get ready to start body work.

With the suspension completely removed, I had only to pull out some key steering components before we could mount the Rotisserie. These included the Pitman arm, the steering arm, the power-steering hydraulic pump, and the idler arm. This last piece must be replaced if there is any play where it mounts to the body; otherwise, its fine to keep yours. Ours showed a minimal amount of movement, but we’ll probably replace it in the interest of optimal handling.
Once all this had been completed, it was time to connect the rotisserie clamps. This required many fine adjustments in the height of the car, the width of the rotisserie arms, the tightness of the bolts, etc. (Many thanks to our friend Christian for helping out). When everything was finally dialed in and secured down, we pumped up the car and rocked it like a cradle. We won’t be able to fully spin the car until we line up the axis of rotation with the car’s center of gravity, but that will come soon: I’ve got plenty of work to keep me busy until then.
Late in the nineteenth century, a Connecticut inventor named W.N. Woodruff invented the Woodruff Key, a way to mate parts to rotating shafts. Mr. Woodruff came up with the ingenious idea of inserting a semi-circular key into a keyway cut longitudinally into a shaft so that a portion of the key protrudes as a tab from the keyway. The tab fits into a notch on a part placed over the shaft and prevents the part slipped over the shaft from freely rotating about the shaft.
Another benefit of this setup is it eliminates the need for expensive milling of an integrated tab into the shaft which concentrates stress. This configuration also helps to concentrically align the shaft and mated part which is critical to reducing wear and vibration in high speed applications. According to Wikipedia, the woodruff key is widely used in machine tools, automotive applications, snowblowers (but how widely used could that be?), and marine propellers.
How ingenious was this idea? Well…Mr. Woodruff’s invention was SO ingenious that in 1888 he was presented with the John Scott Medal by the prestigious Franklin Institute, where over the years many famous scientists have demonstrated groundbreaking new technology. For example Nikola Tesla demonstrated wireless telegraphy at the Institute in 1893, and in 1934, Philo Taylor Farnsworth gave the world’s first public demonstration of an all-electronic television system.
You may be wondering how I know so much about woodruff keys. As recently as two weeks ago, I didn’t know *squat* about woodruff keys. Well, as it turns out, neither does most of the civilized world—especially those who work in automotive parts retail establishments.
If that isn’t bad enough, those enlightened few that *do* know about this part refer to it with different names (none of which are universally recognized either): “crankshaft key”, “harmonic damper key”, “key damper retainer”, “crank key”, “harmonic balancer retainer key”. And just to further complicate things, these devices (whatever they may be called) come in a dozens of “standard” sizes. Here’s a website that offers Woodruff keys “in all standard sizes”:
In case you didn’t already know, the standard Ford 302 cu.in. small block crankshaft requires a 3/16” x 1 13/32” key (and how I learned what size I needed could be the subject of another long essay). These dimensions may be alternatively expressed decimally as .1875” x 1.406” (not that those dimensions meant anything to anyone at NAPA Auto Parts, Kragen Auto Parts, O’Reilly Auto Parts, etc). Just for kicks, go back to the Stanho link above and see if you can locate this supposedly “standard” size Woodruff key in their key list…or alternatively, you can just take my word for it that Stanho’s woodruff key list is specifically devoid of the one “standard” size Jack and I needed. You won’t find it at Stanho or at most of the other places you would think to look for Woodruff keys.
Now keep in mind that Ford manufactured more than one million small block 302 cubic inch engines between 1962 and 2000. Each one of those engines needs this key to keep the timing gears from spinning on the crankshaft (which would prevent the engine from running). Every time one of these engines is disassembled, the Woodruff key on the crankshaft should be replaced. So how difficult could it be to get a standard size (.1875″ x 1.406″) replacement Woodruff key for a stock crankshaft on one of more than one million Ford 302 cu. in. small block engines built between 1962 and 2000? Well, funny you should ask…
(to be continued…)
PLEASE READ THE FOLLOWING IMPORTANT DISCLAIMER: some of the data for this post came from Wikipedia (but please don’t tell Jack or his brothers because their mom and I constantly tell them that “Wikipedia is not an authoritative source”)
If you are surprised that someone would take the time to write about so dull a subject as tool storage, you clearly haven’t experienced the wonders of the MONTEZUMA.
The Montezuma is the remarkable contraption next to Charlie in the photo at the right. These toolboxes are marvels of clever engineering and design. MontezumaMfg call this monstrosity a “Portable Toolbox”, but trust me–there ain’t nothin’ portable about this bad boy when it’s fully loaded. The one I have is the LARGE size and weighs 87 pounds before you add a single socket. Its capacity exceeded even your author’s ridiculously extensive selection of tools.
Before I start to list what it will hold, I recommend you take a quick break, grab yourself a cold drink and strap yourself in for a long ride: