Jack left for camp this morning. That means there won’t be anything new to report (other than a little oxidation) for the next two weeks.
Archive for June, 2010
a little down time
Posted June 30, 2010 By dadnot as fun as tearing things apart, but…
Posted June 29, 2010 By dadJack stopped in for a couple of hours to bring his parts inventory backlog up to date before taking off for camp in the morning. Mission accomplished.
Rat Season
Posted June 27, 2010 By jackFriday night, Dad and I finally got a chance to visit the garage after a three week break. Luckily, everything was where we left it. Our first task was to check the rat traps we set last time. Although we love working in our grungy, commercial-style shop, it can have its draw backs. When Rob dropped in for a visit a few days ago, we spotted two rats climbing down the pipes, and immediately headed off to purchase traps, bait, and poison. Although we didn’t catch any, we did find a dead mouse who had been nibbling one of the poison boxes we strategically placed around the garage.
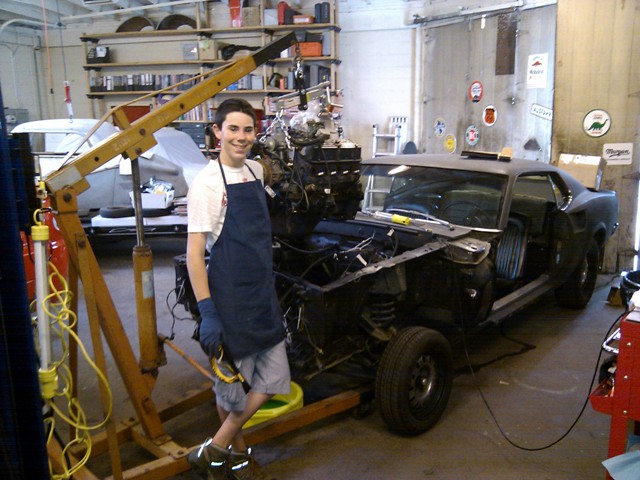
We attempted to take the motor off of the cherry picker and put it on the engine stand, but we realized that we had no bolts for it. After I took a hasty measurement, Dad went to Kragen Auto Supply to get some bolts using the measurements I gave him. After he returned, we tested the new bolts, and, of course, they were too small. After much trial and error with bolt diameter, length, and thread pitch, we finally figured out what size we would need for the next day.
On Saturday we started early so we could get home for a family dinner. Dad set up the radio to listen to the US/Ghana world cup match while I opened up the toolboxes. Working on the Mustang has been taking up more and more floor space, so moving cars was first on our agenda for the day. Dad and I rolled the Mustang out the garage doors temporarily, and moved the truck (a 1965 Dodge A-100 pickup) onto the lift to get it out of the way. Today, Charlie will help move the Citroen 2CV under the lift and rearrange the two Messerschmitts and the Isetta while Dad sets up the security system, and I get started on the bins of parts to be inventoried.
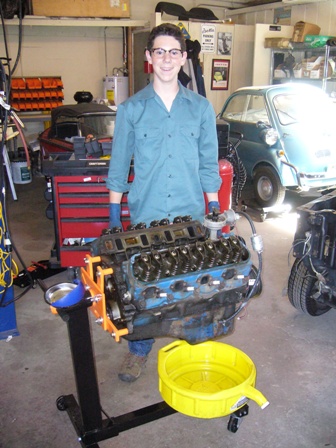
Ready to begin, we set up the engine stand with the correct bolts, and positioned the adjustable arms in front of the screw holes in the block. Before we attached the engine, we removed a few engine-mounted accessories while it was still hanging in mid-air from the cherry picker. First off came all exterior hoses, followed by the distributor. Then, Dad took off the automatic transmission flexplate and I drained the oil pan. Kitty litter proved to be very helpful cleaning up all of the coolant that happened to miss the tub we placed under the engine and spilled onto the shop floor. We also removed the water pump, carburetor, and intake manifold. With all of the accessories removed, we bolted the now much lighter engine block to the stand and detached it from the cherry picker. (Although I knew it was created for this purpose, I was still shocked that the engine stand could support the sheer weight of the motor from one just one end.)
The rest of the day was spent disassembling the engine. After the valve covers came off, we removed the pushrods, placing them into holes punched into the bottom of an inverted cardboard box, and strung the rocker arms onto a coat hanger. This was done so we could keep the pushrods and rockers in order referenced to the cylinder from which they were removed, so we can check for unique wear patterns or problems that could be traced back to a specific problem location in the engine. Last off were the cylinder heads. We took extra care making sure all of the head bolts were removed, after seeing a grisly picture in one of our books of a head cracked in two pieces by its owner who got a little overzealous trying to pry it off after only removing four of the eight head bolts. Doh!
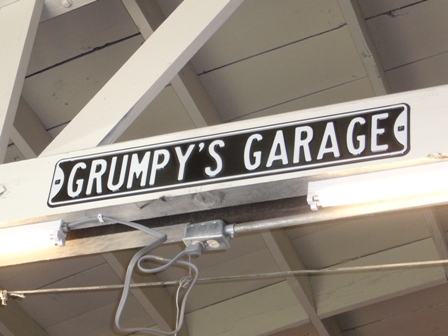
Welcome to Grumpy’s Garage
Posted June 26, 2010 By dadDid you miss us? We took a few weeks off. Last weekend we had a great time with good friends in their family getaway at Sheep Ranch in Calaveras County. In addition to the outstanding company of good friends and family, we went spelunking in Moaning caverns and spent a few hours wandering around Murphy’s, CA. While in Murphy’s, Jack picked up a father’d day gift for me which he surprised me with on Sunday morning. I love my gift which we hung today in the Three Lions Garage:
Do you think he may be trying to tell me something?
Today we finally got back to business and began to disassemble the engine. I’ll let Jack share the details with you, but allow me to tease you with a few shots…
Rebuild ahoy!
Posted June 7, 2010 By jackThe fateful day finally arrived. Once I had finished cataloging the parts left over from our last work day, we ran a final check to make sure no mount was left secured, no hose attached, no wire plugged in. We also removed the bolts we used to secure the engine load leveler and checked that they fit their corresponding holes. After Dad and I were positive we were ready to lift, we supported the bell housing with a floor jack so it wouldn’t fall away when we removed the motor. Using the cherry picker, we raised the engine a few inches to clear the compartment mounts, pulled it from the transmission converter, and continued lifting. Dad then saw, to his complete and utter horror, that we had not only forgotten to replace one of the load leveler bolts, but the L-bracket on the load leveler was barely supporting the edge of the block. He quickly lowered it back into the compartment while I replaced the bolt. Secured once again, the engine was lifted free of the compartment.
With the engine free, we looked for the casting number to determine which specific engine model we have. After a little more degreaser and scrubbing, I found it above the starter motor: C80E-6015-A. We deciphered it using our Small Block Ford Engines book to determine we have a Cleveland-built 302, manufactured in ’68 or’69. It wasn’t the 390 that was originally installed in our S code fastback, but a great engine with lots of exciting possibilities.
While waiting for our friend Rob to arrive (who rebuilt his own ’66 289 cid. V8), we assembled 6 shoddily-constructed Chinese wheel dollies for the two three-wheelers in the TLG “Scuderia Bizzari”: Messie and Schmitty. Rather than forcing me to hand-tighten all 96 bolts to secure the casters on six dollies, Dad mercifully produced an air-powered socket wrench deep from the bowels of the Craftsman tool chest.
When Rob showed up, he got a chance to check out the motor. We asked him a few questions about his rebuild, and decided we would rebuild our engine as another part of the project.
Moving the engine, now hanging from the cherry picker, required that we move the car, but the bell housing was still resting on the floor jack. My book recommended using coat hangers to tie the bell housing to a 2×4 across the engine compartment. Without any coat hangers at the shop we improvised with Rob, using some heavy-duty zip ties to hang the bell housing from two broom sticks. The zip ties snapped under the weight of the bell housing. Looks like we’ll be bringing coat hangers next time.


 Feed Validator