Author Archive

VOILA!

Posted January 3, 2011 By jack

Engine Complete? CHECK!

Fini! Terminado! Finito! DONE!

(Drums, please!) The motor is finished!

Didn’t think I’d be saying this a whole year into the project.  I mean, how long can engine reassembly take? Ah well, I’ll just have to pick up the pace. My goal is to finish the whole project by the time school starts next year (sometime in August). More than half of the total hours will be put in during the summer. Hopefully I still have the drive to finish my car. No pun intended.

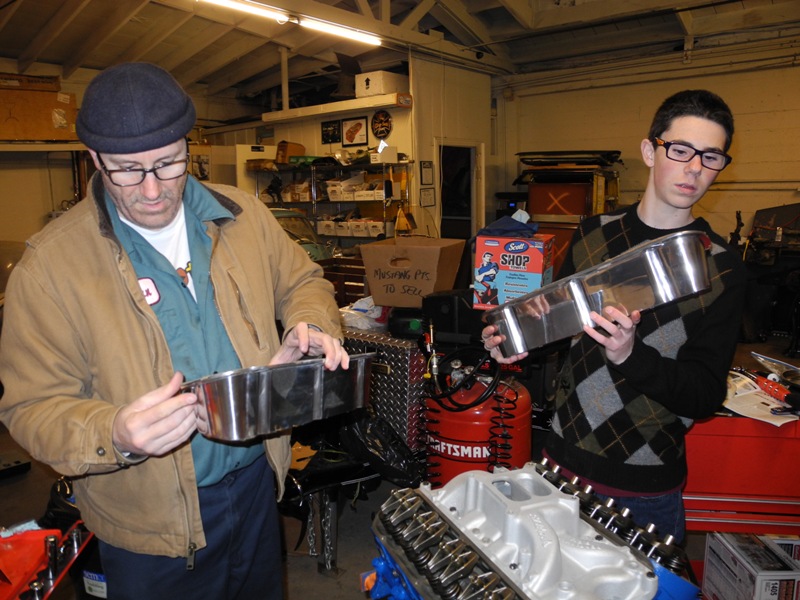
On this fateful day, we started at the garage at about 12:30 (sleeping in late will have to end tomorrow, unfortunately, when school starts up again). The day was started by restocking our supply of Canada Dry at TLG (an essential part of our diets). Ace Glass Services stopped by to replace the cracked windshield on my dad’s Carrera 4 while I fit the valve cover gaskets to our shiny new Edelbrock covers. Dad helped shellac the gasket to cover surface, and I put on the baffle plates for the breather and PCV system that will be installed later.

Nice Mutton Chops, Dad!

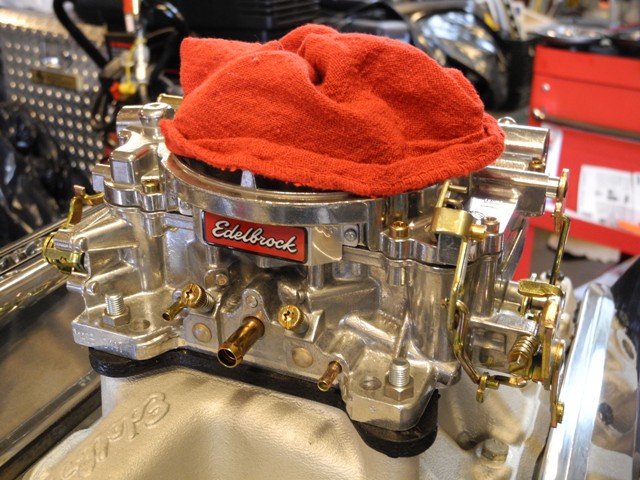
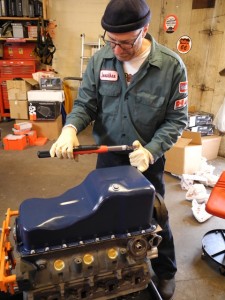
Time to screw down the valve covers. Uh oh! There wasn’t enough clearance to torque down the bolt/lockwasher combos that came with our engine bolt kit. After trying, with no luck, to remove the washers, Dad showed me how to use the bench-grinder to grind down the rounded side of the lockwashers. Many sparks later, we torqued down the valve covers and proceeded to install the carburetor. First screwing in the carb posts and sliding on the heat dissipator/spacer we bought at Vic Hubbard’s out in Hayward (great one-stop auto store), the carb went on and the nuts tightened it down. Until the engine is in the car, we can’t connect throttle or choke linkages, so we moved on to installing the water and fuel pumps.

Water pump went on without a hitch.  We bolted it on over the gasket with RTV sealant on both sides and moved on to the fuel pump.  After extensive hunting through the 1969 shop manual, I finally found what I had told Dad all along, that silicone sealant needed to be used on both surfaces of the gasket. We turned the crank until the pump arm fit into its slot, and greased the end with assembly lube where it meets the cam. After the fuel pump was properly torqued down, I installed the crank damper bolt and then rotated the crank with a finger in the #1 cylinder spark plug hole to find TDC (following the compression stroke) to drop in the distributor. However,we decided it made no sense to spend too much time dialing in the ignition timing with the engine just hanging on the stand, so we decided to leave the distributor off until the engine is back in the car.

A job well done.

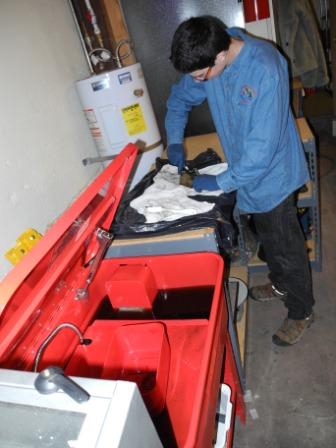
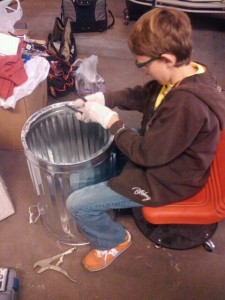
cleaning the original FoMoCo parts for eBay

Rob, our Mustang Man stopped by to check out progress, and Mom brought over Cousin Lisa and her boyfriend Adam to see the Garage. Glad to see everyone, please come again.
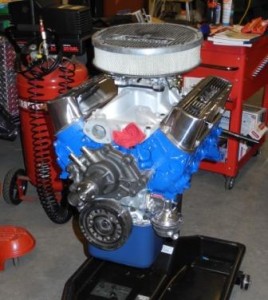
Our 302: all dressed up and nowhere to go

Posted December 28, 2010 By jack

Alright! Reporting from Snowbird, Utah right now, tired from a long day skiing.

My English teacher once told me that writing is like a miniskirt: it should be long enough to cover the subject, but short enough to keep it interesting.

I plan to make this entry short and concise.

Installing Oil Pan

Now that the valve train is assembled, the only thing left to do before the intake manifold went on was to check the rocker arm-to-valve tip clearances. After the fact, we learned that because we’re using a stock cam (as opposed to a race cam) we only needed to tighten down the rocker arm nuts until there was no play in the pushrods, then give them an extra 1/2-turn. Instead, we adjusted each valve to a specified clearance with a feeler gauge. As if this wasn’t difficult enough, each valve must be adjusted when the lifter is in a specific position relative to the cam lobe (determined by finding Cylinder 1 TDC to start), and then turning the crankshaft first 180 degrees and then another 270 degrees to finish adjusting the complete set of valves. Out of the shop manual and three books we were looking at, only one gave us the information required to accurately carry out the procedure.  It took us two tries to get it right: after our first attempt, we knew we had done something wrong when all of the rocker arms we tightened were coming off the valve tips after moving to the second set of adjustments.

back to Ford Blue

Once the rocker nuts were all tightened correctly, I applied gasket shellac and silicone sealant to the intake manifold-to-head gaskets. Rather than using the cork gaskets that came with our  gasket kit for the front and rear of the intake manifold, we decided to use silicone sealant instead; We’ve heard that the cork gaskets have a tendency to be squeezed out when the manifold is torqued down and are a common failure point. With the intake manifold (newly cleaned and shined from the machine shop) attached to the block, we turned to the bottom end to install the new oil pump.  We re-used the old stock oil pickup, which cleaned up nicely in our parts washer.  We applied silicone sealant to the oil pan gaskets, and new oil seals at the front and rear of the crank.

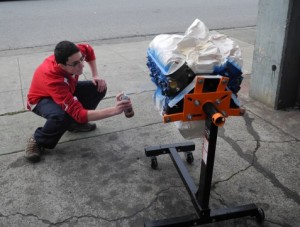
Next we installed the oil pan in torqued all the fasteners to their proper specs.  Dad and I then commenced to mask the block for painting.  Using masking tape and some of the packing paper from the parts we purchased, we carefully covered all of the surfaces which would not be painted (e.g. the intake manifold and new aluminum timing cover).  I inserted balled-up wads of paper in exhaust ports, screw holes, vents and other various apertures in the block and inserted the old spark plugs to cover the threads in the spark plug holes. Once the important parts were covered, we sprayed the block down with the Ford-Blue Aervoe paint we picked up at Al Hubbard’s Machine Shop in Hayward. The result was really beautiful!  Although we didn’t finish the complete engine assembly before heading off on our annual winter pilgrimage to the snow-covered steeps of Little Cottonwood Canyon, we are looking forward to soon announcing that “major engine assembly operations at the Three Lions Garage have ended”.

test fitting the Valve Covers - note intense concentration faces!

P.S. Dad’s friend Mark stopped in for a visit with my pals Eric and Jack to check out the Mustang and the garage. Jack is considering a notchback project of his own in the near future, and I hope he left TLG with some inspiration and ideas.

Winter break… time at last

Posted December 18, 2010 By jack

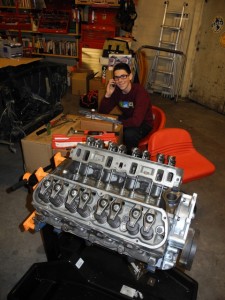
302 with heads installed

Oops. Sorry I haven’t posted much lately… between the play, finals, and what little is left over for my social life, there hasn’t been much time to work at the garage. Thank heavens it’s winter break now.

Last weekend, we inserted the front oil seal into the timing chain cover. After warping the first two that came with our engine kit, Dad was finally able to fit the replacement we got at Kragen of South City with the seal driver set we bought there. We then installed the gasket for the timing chain cover with silicone sealer, torqued down the cover, and trimmed the extraneous pieces of gasket. We also got the left cylinder gasket and head installed before it was time to pack up.

Today we installed the second cylinder head and started on the valve train. With the lifters and bores lubed nice and proper, in went the pushrods. Next, we lubed the inside of the rocker arms, inserted the pivots, and placed them over the screw-in studs. Oddly enough, there were two types of pivots, but they fit just the same, so we’re hoping there are no problems. We hand-tightened the nuts, and were researching the proper rocker arm-to-valve clearance when it was time to go. Before going home, we picked up some gasket shellac from NAPA Auto Parts so we can install the intake manifold tomorrow. The guy at the Napa counter was very helpful, and pointed us to a sale at Vic Hubbard Speed and Marine, so we’ll be driving there tomorrow for an electronic ignition setup for the mustang.

The Mustang MacGyver

Posted October 25, 2010 By jack

Yesterday, I squeezed in some time at the garage to prepare for piston installation. Well, our plan was to get to pistons, but we ran into a couple problems (don’t we always?). Ollie tagged along to work on his Oscar the Grouch costumein the last few days before Halloween.

Ollie, hard at work preparing for his favorite night of the year

The new bolts for the thrust plate arrived, so I put some Loctite on ’em and hand-tightened the thrust plate. I was getting ready to torque them down, when I realized how bizarre it was that the integrated oil groove didn’t connect with anything. Then it hit me that my engine was upside-down on the stand, so the “Back-Bottom” indicator on the thrust plate should have been on the top side. Oops!

Having corrected that mistake, I started on the fuel pump eccentric. I took the part and its hardware over to the parts cleaner (which Dad had just topped-off with two five-gallon pails of ridiculously expensive part cleaning fluid) and discovered that a pinhole in the back had leaked a river of cleaner that was slowly winding its way towards “Schmitty”, the 1958 Messerschmitt. I alerted Dad, and grabbed the kitty litter to soak up the mess. Dad leaned the parts cleaner at an angle to stop the flow, and grabbed some gasket sealant to temporarily fix the problem. Once we had cleaned up the area and propped the cleaner against a table at a dangerous but stable angle, he used epoxy resin as a permanent fix.

With the parts cleaned, I placed the metal dowel into its hole and slid the pump eccentric, bolt, and washer over it. Yet something didn’t seem right… the dowel stuck out too far and wouldn’t allow the washer to sit flush. We then looked into our camshaft box and found two dowels that had come with it, one shorter and one longer. We took ours out, and found that it was as just as long as the longer of the two. But sure enough, when we put the new dowel in, it still didn’t give the washer enough clearance to sit right. So we called up someone we knew could git ‘er done: our good friend and Mustang enthusiast Rob. In his 289, he had switched to an electric fuel pump for reliability, but he new exactly what I was talking about. Rob drove over to take a look at it, and suggested we just grind down the dowel. Then, he came up with a better brilliant idea: why not try and knock it in with a mallet? In our effort not to mess up the ‘perfect’ engine rebuild, we were too cautious to do what needed to be done–bang on it with a hammer! The dead-blow hammer did the job. I torqued down the bolt to the correct specification and we packed up for the night.

P.S. Our camera we habitually take to the garage lost an essential part (the shutter release button) during its trip with Dad to Infineon Raceway. Until it is fixed, we will have to rely on phone-pictures. We apologize for the inconvenience.

“Screw”-Ups and Equipment Failures

Posted October 15, 2010 By jack

On Wednesday, Dad and I stopped by the house of our good friend and gearhead Rob to pick up his click torque wrench before heading to the garage. Years ago, Rob rebuilt a ’65 289 that he dopped into his ’84 Mustang.  Rob decided to join us at TLG with his two kids. Now that we had an accurate torque wrench, I applied Lock-Tite to the thrust plate bolts and tightened them down. However, I had never used a click torque wrench before, and was under the impression that it would slip and cease to tighten when the desired torque was reached. Next thing I know, the head snapped off, with the bolt itself still embedded in the screw hole. Good thing we doused it in Lock-Tite first!

Had Rob and his children not been there, I definitely would have had to endure the wrath of my father. Dad grabbed a bolt extractor and attached it to his power drill, but the clutch on his 13-year old drill picked a bad time to conk out and the suddenly useless drill wouldn’t spin the bit. Then we tried using his impact drill to drill a hole in the bolt with our carbide-tipped Bad Dog drill bits, and then gave the bolt-remover another go. With a spectacular display of smoke plumes and much effort on the part of the power drill, the bolt finally gave up and came out. I cleaned the metal slivers off of the block while Dad put the tools away, and we kept the other thrust plate bolt for reference when we buy new hardware. We then finished tightening the main cap bolts and packed up for the night. At home, Dad ordered the hardware, a new water pump and a camshaft degreeing gauge. There will be no blog posts this weekend: Dad will be away on a three-day racing class at Infineon Raceway/Sears Point.

Loss of Yardage

Posted October 14, 2010 By jack

Knowing Dad was going to be gone this weekend, I made sure to get my homework done early on Tuesday and Wednesday so Dad and I could get as much work done at the garage as possible. We left the block, now with its newly balanced crankshaft in place, under a garbage bag to protect it from the elements. However, the book we have been using for reference covers reassembly of an overhead-cam engine, but a ’69 Ford 302 is cam-in-block. Apparently, cam-in-block engine assembly begins with the cam, which meant we had to pull the crank. Again. On Tuesday, we opened up the box with our new cam, slid it into the block, and coated the lobes with Lubriplate and the cam journals with oil. Then, we replaced the crank, applying a liberal amount of lube, but we couldn’t torque it down fully due to the fact that Dad’s fancy-shmancy digital torque wrench broke last time at the garage, so we used our manual one and torqued it down to between 60 and 65 foot pounds rather than the 70 foot-pound  maximum our shop manual recommends.

Mental note: don’t forget to bring the camera home next time.

Let the fun begin!

Posted October 3, 2010 By jack

Finally! My homework is finished, I’ve gotten some sleep, and Dad isn’t busy. We all know this means I get to spend more time with my rapidly growing addiction to auto-restoration.

My dad’s been nervous as a long-tailed cat in a room full of rocking chairs because our engine is going to start oxidizing if we don’t start reassembly soon. So that’s exactly what we did. When we got to TLG, I started looking up the accessories we would need to rebuild, while Dad set up “the Defender”:

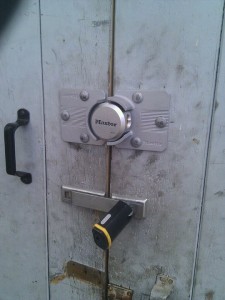
TLG just got Fort Knoxed

We then locked up (taking a moment to fully appreciate the new sentinel standing guard) and headed to NAPA to grab supplies. They had most of the things we needed: engine lube, Plastigage, RTV sealant, Lubriplate cam lube, and the protective hand lube Dad wanted. However, they didn’t carry piston ring compressor tools, or the correct (so we thought) engine oil. So we called Kragen, while waiting for our cheese-steaks, to ask if they sold them. It was a disaster… “Air compressor?”/”No, a piston ring compressor tool.”/”For piston rings?”/”Yes, that’s what I said.”/”Would you like to rent one?”/”No thanks, I’m asking if you sell them…” You get the idea. Dad eventually got him talking, and we learned that only South City carried the tools. After driving out and back, we finally had everything we would need to start.

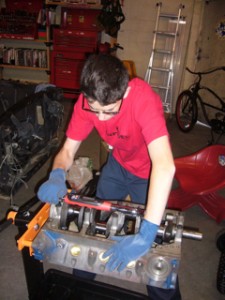
First, I cleaned off the engine stand and bolts so as not to contaminate our shiny new block, and Dad helped me lift it onto the stand. After giving the block a swipe with compressed air, I used carburetor cleaner to clean out the cylinders. Then, I removed the main caps and opened up the box of main bearings from our master kit. The bearings were placed in the crank journal and lubed up, and then I lowered our newly balanced crank onto the bearings. Charlie joined us about then, and got to work on his LED light kit for his model Batmobile.

Getting a little overzealous, I started placing the other half of the bearings into the main caps, when I realized that I forgot to lube the underside. Luckily, Dad came to the rescue and pried them out with a screwdriver. Once that situation was sorted out (and once I had received a lecture about the necessity of following the instructions when it comes to engine rebuilds), Dad gave me a dead blow hammer to help the caps seat properly. Having looked up the correct torque specifications for the cap bolts in our 1969 shop manual (60-70 ft/lbs), we fastened the bolts step by step, starting at 30, then 50, then 65, using a torque wrench. When we could see that the crank would still turn, we removed the caps again, placed the rear oil seal in the fifth cap, and placed a small strip of Plastigage across the third. (Before we left for NAPA, I checked the desirable bearing-to-crank gap, and we bought the right color Plastigage for the measurement.) We then did the procedure over again, torquing each cap in segments up to 65, making sure to start with the center cap and work our way out so as to spread the pressure evenly. When all of the bolts were tightened, I removed the center cap and Dad measured the Plastigage, which was right in the middle of the allowable range. After a quick, satisfactory check for crankshaft endplay, we sprayed down our assembly with WD-40 and headed home, on account of Dad had to catch a flight.

Until the next time, I can’t wait to continue. I love this part of the restoration, because everything’s clean and there’s no part inventory involved!

A Night with Derek Bell

Posted August 29, 2010 By jack

Last night, my dad took me to a dinner at a local car club he belongs to. The featured speaker of the evening was Derek Bell, the famous British racecar driver. In case you’re not familiar with him, here’s a little background. Derek started racing a Lotus 7 when he was twenty-three, and quickly worked his way up to racing Formula 1 cars for Ferrari. Among his most impressive achievements, he has won Le Mans (the oldest endurance car race) five times, and 24 Hours of Daytona (an American endurance race) three times.

We arrived towards the end of the dinner, because my parents were attending their friend’s fiftieth birthday party, which also marked his fifth year as a cancer survivor. Derek hadn’t spoken yet, so we inhaled our Caesar salads and short ribs (which were excellent) while introducing ourselves to the others at our table. After dinner was cleared, the president of the club introduced Derek, who began by talking about some of his experiences racing. He started by showing us what it was like to race in Le Mans; he narrated as we watched some video taken from a camera attached to his car on a qualifying lap. I cannot begin to describe how exhilarating it was watching a POV shot of him doing 234 m.p.h. on the Mulsanne Straight. Moving on, he spoke about the making of the 1971 movie Le Mans, which he starred in with Steve McQueen.

After he finished with his presentation, he opened up the floor to questions from the audience. Although I don’t remember all of them, they brought up some interesting topics, such as why he was so successful with some of his teammates, especially Jacky Ickx, with whom he won Le Mans three times. He also talked about his son, Justin, who decided he wanted to become a racer. When the questions were finished, Dad approached him after the event and asked if he could sign a few books (of course, he brought four). Mr. Bell thought it was great that Dad and I are rebuilding an old muscle car, and he gave me some advice on driving a Mustang (they handle terribly). He was incredibly nice, and he showed a lot of interest when you were talking… he wasn’t always babbling about himself. I was glad to have an opportunity to meet him.

Improvisation

Posted August 28, 2010 By jack

Having taken a break quite longer than we had planned, Dad and I finally got some work done at the garage. Quite a bit, if I might say. While I dismembered my pony, Dad finally got around to finishing some items on our never-ending garage to-do list.

With the engine in pieces and awaiting a trip to the machine shop, I was able to start tearing out the interior. I started with the rear quarter-windows. Once again, my minimalist restoration book led me on a wild goose chase, failing to explain all of the steps necessary to remove the windows–so I improvised. The bottom window hinge cover was beneath the C-pillar interior panel, and was secured with some sealant goop, even though it contained holes for screws. Dad’s denatured alcohol didn’t suffice to de-goopatize it, but WD40 came in handy for this. Before I could get to the cover, however, I had to remove the rear seat cushion, which was most easily accessible when the front seats were out. To remove those, I had to jack up the car, pull out the bolt plugs in the floor pan, and unbolt the seats blindsighted.

Can't quite see the road...

More next time from Three Lions Garage…!